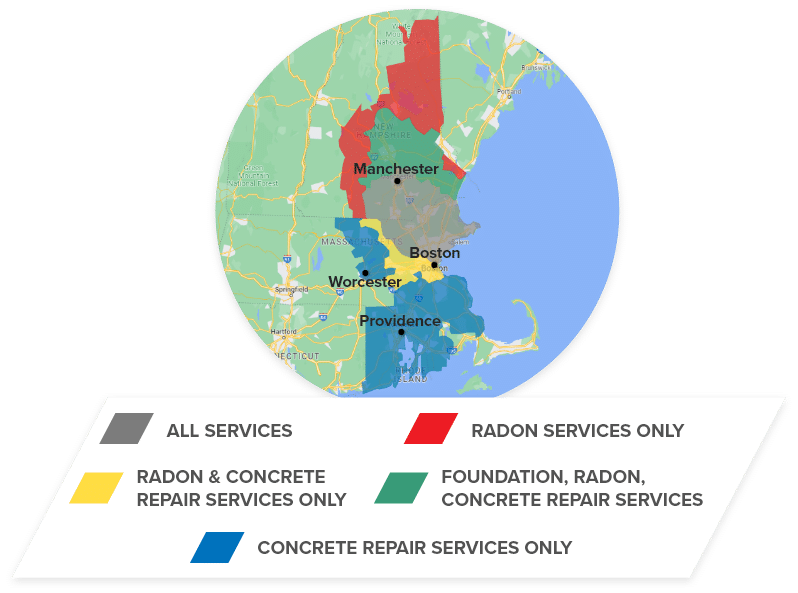
Serving Southern New Hampshire, Middlesex and Essex Counties Massachusetts


Foundation Repair & Radon Mitigation Company Servicing Merrimack County, NH
Click the icons to see what our customers had to say.
-
 New London, NHMonday, Nov 29th, 2021"Wanted to restore the foundation wall to provide proper..."
 -
 New London, NHMonday, Jul 25th, 2022"Great work all good!"
 -
New London, NHThursday, Jan 6th, 2022
Erickson Foundation Solutions has been the trusted, local professionals to call in Merrimack County, NH, for foundation repairs, concrete repair, radon mitigation, basement crack repair and even crawl space repair. Our in-house team of expert engineers know how to properly determine and repair the structural issues you are going through. Whether you have water in your basement or your crawl space, or need concrete lifting, leveling or foundation structural repair, we have your back. We provide a 25-year written warranty for all of our foundation products. With the professionals at Erickson Foundation Solutions, you can feel safe knowing that your repairs are in good hands.
Foundation Repair Contractor Merrimack County, NH
No one wants to have to go through structural and foundation repairs, but there are times where you shouldn’t wait any longer and call the trusted local professionals Erickson Foundation Solutions, to get your job done the right way. Our products are designed and tested by Supportworks, Inc.; an international network of more than 100 skilled structural repair contractors. We are the areas only company equipped to fix your repairs with these products. Some of the repairs we take on are:
- Bowing Walls
- Sagging Floors
- Stair-Step Cracks
- Tilting Chimneys
- Foundation Cracks
- Garage Slabs
Merrimack County, NH Local Concrete Leveling Expert
Sunken and cracked concrete around your home is not only an eyesore but is also a safety hazard. As time goes by, if the problem isn’t corrected, it will only get worse. However, you have no reason to fret when you have the professionals at Erickson Foundation Solutions doing the work. Our experts use PolyLevel, a strong, and durable foam material to lift your concrete slabs back into place. We drill small holes into the slab where the foam is injected and expands, raising the concrete into place. Many other contractors will use mudjacking, but our method doesn’t disturb the area, takes less drying time, and is more affordable.
After repairing your concrete, consider a durable concrete sealant that extends the life of your slabs by 3 to 5 times overall in just one quick application. Our SealantPro concrete sealant bonds with concrete on a molecular level to protect slabs against oil, gasoline, water, debris, and more. Whether you have new slabs or existing slabs, SealantPro will work for you! We also offer a translucent tinted concrete sealer, DecoShield, which adds a unique visual appeal to your home's slabs while preventing pitting, flaking, cracks, and other moisture-related issues.
Our Concrete Repair Solutions:
- SealantPro® Concrete Sealing
- DecoShield® Concrete Sealer
- Sidewalk Repair
- Pool Deck Repair
- Concrete Driveway Repair
- Mudjacking
The benefits of PolyLevel®:
- Non-invasive installation
- Quick application & curing
- Clean &precise lifting
- Adjustable & durable for loads of all sizes
Contact us today to schedule a free concrete leveling estimate for your Merrimack County home or commercial property!
Get in contact with us today and get your FREE concrete leveling and concrete sealing estimate!
Crawl space repair contractor in Merrimack County, NH
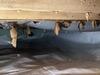
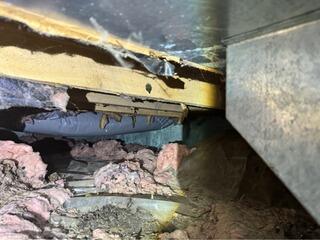
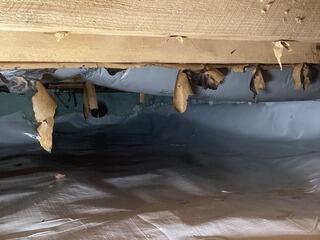
The crawl space is often an underappreciated part of the home that often gets issues with mold. Since it is more often an out of sight out of mind, when problems occur with your crawl space it can easily have wide-ranging effects on the entire home. This is especially true since many older crawl spaces were vented due to mistaken beliefs about home construction. These vents make it easy for mold and rot to occur, causing issues throughout the home like uneven floors, foul smells, worsened allergy symptoms, and more.
Crawl Space Repair Services Offered in Merrimack County, NH:
- Crawl space vapor barrier
- Crawl space waterproofing
- Crawl space dehumidification
- Crawl space support posts
- Crawl space insulation
- And more!
If you are noticing any of these issues then our experts can help. We offer a wide range of crawl space repair services designed to help your home including encapsulation, waterproofing, insulation, and more. Contact us today to schedule your free estimate!
Radon Gas Mitigation Systems
Radon gas is colorless, odorless, and as cancer-causing as to//bacco and asbestos. Radon gas is produced from the decaying of rocks and soil and comes up from the ground into your crawlspace and basements. The way our radon mitigation systems works in a pipe collects the gases that are coming from the soil. The gas is then piped upwards where a depressurization vent forces the radon out from your home. Our radon mitigation system is completely compatible with the current waterproofing system in your home. Get in contact with us now to learn how to protect your loved ones from the harmful effects of radon gas.
Radon and Indoor Air Quality Services Provided in Merrimack County, NH:
- Radon Testing and Inspections
- Radon Mitigation and Abatement
- Indoor Air Quality Testing
Basement Crack Repair
At any stage of your home when water starts to leak, it can lead to serious flooding and serious damage. So when it starts to leak in your basement, act fast. Erickson Foundation Solutions understands how all different types of basement leaks are caused, which is why we provide fast and efficient solutions to handle every source of wall and floor leaks. we also offer egress windows and dehumidifiers
To get a free estimate on basement leaking solutions and crack repair services, call us at 1-814-281-8505 or click below!


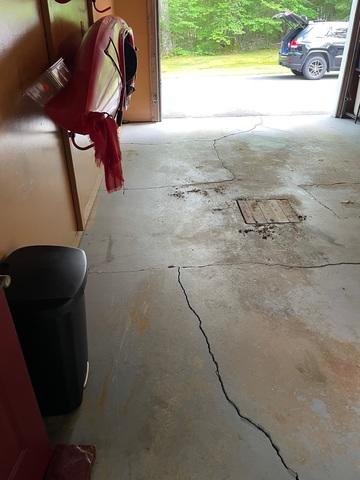
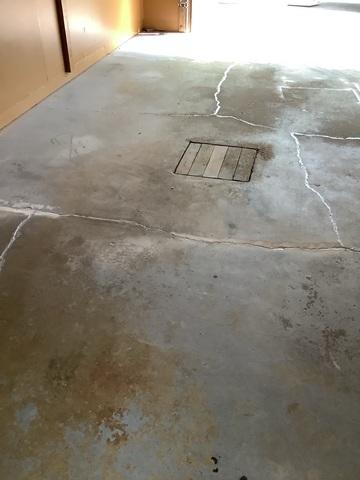
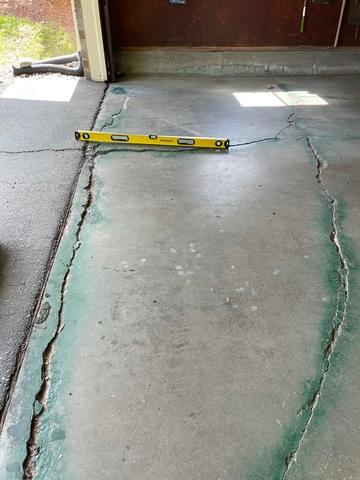
Kevin O. knew when he bought his home in Bow, NH that there were some concerns with some cracks in the garage foundation walls and floor. Over the years the cracks grew slightly, and Kevin decided it was time to finally work towards finding a solution. He really wanted for his property to hold it's value, and sealing cracks and having a professional take a look at it for him would provide peace of mind.
Design specialist, Kyle Jamerson, inspected the cracks in the walls and floors, and it was determined there was not much movement or settlement action. With that in mind, the ideal, immediate solution was to seal the cracks with a polymer foam injection and NexusPro sealant.
However, in order to keep an eye on the possibility of settlement under the foundation, our production team also installed crack monitors. These monitors will allow Kevin to notice if there is indeed any movement or settlement in his garage foundation.
With the project completed, Kevin has peace of mind that his home is safe and stable.


This homeowner in Hooksett, New Hampshire, was looking for someone to come and assist with a sagging floor. Design Specialist David Cormier came to the home and proposed that the homeowners have Smart Jacks installed in their crawlspace. Crew Lead Jon Provost and his team came to the home and installed the Smart Jacks into the crawl space. The Smart Jacks support the interior of the home to push up the part of the floor that was sagging.

Steven W. in Epsom, New Hampshire had an issue where his attached garage had been shifting for the past couple of years. It has been getting worse and worse over the years and finally, he knew he needed to fix the problem before things got even worse and caused more damage to the home.
Design Specialist Paul Magowan concluded that the area wasn't draining properly and which led to soils shifting, ultimately causing the garage to shift. Paul proposed to the homeowner an effective drainage system, as well as a wall rebuild since the existing wall had become too unstable.
Crew Lead Nick Carelli and his team completed the drainage system and the wall rebuild, along with Matt Erickson Sr., who is our head mason.


Evan P. of Concord, New Hampshire was curious about radon levels in his home. He called Erickson Foundation Solutions to see if we could set up an appointment to come out to his home. The home was tested with a CRM machine by Design Specialist Paul Magowan. The results of the test came back at 3.8 pCi/L.
Crew Lead Branden Edwards and his team came to the home and installed a radon system.
Evan was impressed by how quick and easy each step of the process was.


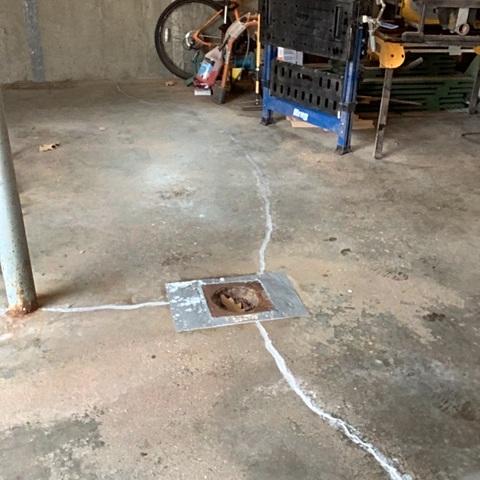
Homeowner Dale had lived in his home for over 24 years, though the home itself was built in 1976. The original homeowner had installed a drain of some kind in the floor of the garage slab, and so over 50 years water was flowing into this drain and seemingly straight into the soil beneath it. When Dale purchased the home, he noticed the drain and the fact that the slab had shifted a bit. However, it wasn't a must fix for him at the time. In recent years, the slab had begun to crack and shift more and more, and Dale knew it was time to address the issue before things got worse. In some places near cracks, there was settlement of up to 3/4 of an inch. Replacing an entire garage slab could be costly, and so he sought out other options. His ultimate goal afterwards was to also have the surface painted to brighten up the garage space.
Design specialist Paul Magowan met with Dale and inspected the garage slab. Paul concluded PolyLevel would be an appropriate solution for the problem, and proposed the fix and costs involved. Dale was thrilled to learn he would not need to replace the slab entirely, and hired Erickson Foundation Solutions to install the PolyLevel to fill the voids beneath the slab, and lift and stabilize his garage floor.
Crew lead Nick Melo and his team were able to lift and stabilize the concrete garage slab, as well as seal on the cracks with NexusPro, all in a single day. Dale was able to use and even drive his vehicle back into the garage space within 30 minutes of job completion. The PolyLevel solution saved Dale time and money, and now he can repaint the garage floor and have peace of mind that it is stabilized and will likely no longer shift or crack.


James M. of East Kingston, New Hampshire was closing on his home and needed a Radon Mitigation System. He called Erickson Foundation Solutions to see if they could come out and install a Radon Mitigation System. Design Specialist Jason Vachon came to the home and designed a radon system.
Crew Lead Branden Edwards and his team came to the home and installed a Radon Mitigation System.


Robert R. of Concord, New Hampshire has been experiencing cracking and unlevel floors in his garage. The floors are causing a tripping hazard. In fact, Robert's wife has tripped several times. Robert called Erickson Foundation Solutions to see if someone could come and suggest a repair solution.
Design Specialist Paul Magowan came to the home and inspected the garage. He found that all the crack was in the first 4 feet of the garage door. He recommended cutting out that 4-foot section of the garage slab and pouring a new one. Robert requested if Erickson could find a way to make the water from the gutters travel through an underground drainage system.
Crew Lead Nick Melo and his team came to Robert's home. Nick cut out the section of the garage that had the cracks in it. After, they brought in some dirt and made the area level. Then they poured the new slab and made sure it was level.
While the new concrete slab was drying a second team led by Spencer Ladd came to the home to rework the gutter system. The team connected a pipe to the gutters and dug a trench for the new pipe. The trench was dug away from the home to ensure water wouldn't go under the foundation.
This homeowner had noticed a crack in the front of their home and they wanted it to be looked at. They called Erickson Foundation Solutions for a free inspection.
Design Specialist Michael Bradley arrived at the home and inspected the foundation crack. Michael found that the foundation was cracking because the home was settling. Michael recommended having push piers installed.
Crew Lead Scott Crandall and his team arrived at the home and installed push piers.


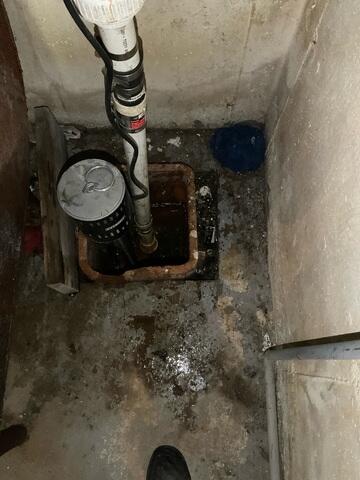
This homeowner in Allenstown, New Hampshire was experiencing cracks and water in their basement. They are worried about drainage around the home. They decided to call EFS about a free inspection.
Design Specialist Michael LaMalfa arrived at the home and inspected the basement. Michael recommended that the homeowners have the cracks sealed and have a sump pump installed in the basement.
Crew Lead Branden Edward and his team arrived at the home installed a sump pump and sealed all of the cracks in the foundation.

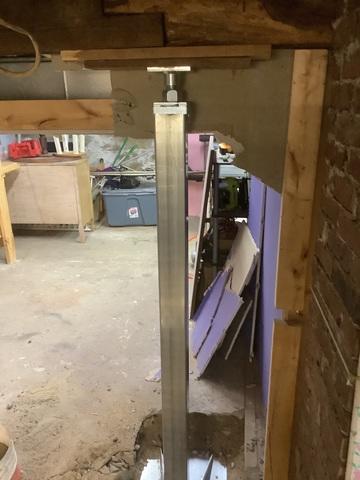
This homeowner in Derry, New Hampshire was experiencing some sagging in their floors. The main beam in their basement is sagging. They decided to call EFS for a free inspection.
Design Specialist Jason Vachon arrived at the home and inspected the basement. He recommended that they have SmartJacks installed under their main support beam.
Crew Lead Ed Nadreau and his team arrived at the home and installed 4 SmartJacks under the main support beam.
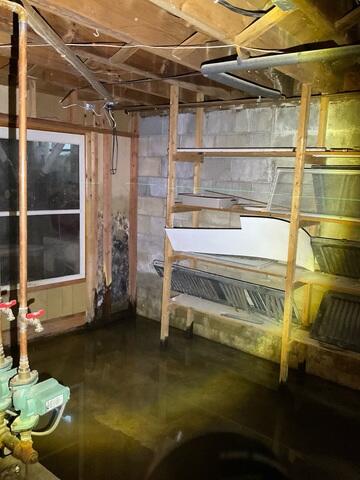
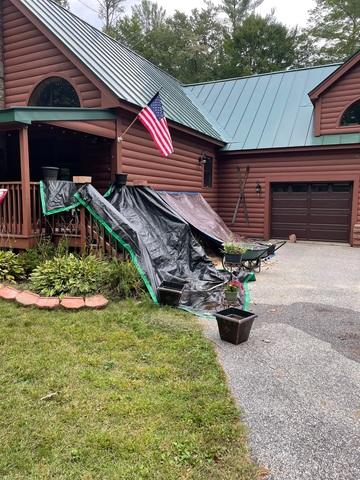
This homeowner in Canterbury, New Hampshire has been putting up tarps in the front of their home to try and stop water from entering their basement. Water has been consistently collecting in the basement and the homeowners don't think the two sump pumps can keep up with the water. The homeowner decided to call EFS for a free inspection.
Design Specialist Michael LaMalfa inspected the inside and outside of the foundation. Michael found a small crack in the front of the home near where the tarps are set up. During Michael's exterior inspection he had determined that there is a high water table around the home. Michael recommended installing WaterGuard, Super Sump, Freezeguard, Triple Sump, and a SaniDry into the basement.
Crew Lead Anthony Rivas and his team installed the WaterGuard, Sump Pump, and Freeze Guard to the front of the home. Then Anthony and his team replaced the old sump pumps in the back of the home with a Triple Safe Sump Pump and a Freeze Guard.
The Office Manager of the New Hampshire Conference of the United Church of Christ wanted to repair the concrete walkway leading into the building. The walkway has some tripping hazards that they would like reduced. They decided to call EFS because the previous company that repaired the walkway didn't hold up like they said it would.
Senior Design Specialist Michael LaMalfa inspected the walkway. He recommended injecting PolyLevel to level the concrete and reduce the tripping hazards.
Crew Lead Nick Melo and his team injected PolyLevel underneath each slab to lift and stabilize them, completing the project in a single day. The walkway is now safer for pedestrians and parishioners.

In Hopkinton, New Hampshire, The First Congregational Church of Hopkinton NH is experiencing rusted temp supports in the basement. The church members would like to feel safe as they sit and listen to the pastor and sing as a group. The church called Erickson Foundation Solutions for a free inspection.
Design Specialist Michael LaMalfa inspected the basement of the church. He found some rusty temporary posts and some blocks that had sunk. Michael recommended installing 20 SmartJacks into the basement of the church.
Crew Lead Chris Tremblay and his crew installed 20 SmartJacks in the church's basement. For added support 30' of Supplemental Beam was installed to bridge some of the SmartJacks together.
The church members can now listen to the pastor and sing while feeling safe.

In Chichester, New Hampshire, a homeowner has experienced cracking in their garage for the past 7 years. The cracks have been getting worse and worse over the years. The homeowners are continuing to work on home improvement projects. They wanted a company to come out in the spring to fix the concrete in their garage. They had reached out to a couple of companies and only a couple could do an installation in the spring. They had a couple of companies inspect their home, and most of the companies recommended replacing the entire garage floor. When EFS came to their home for the inspection, they were surprised by the proposal. The EFS Design Specialist recommended installing PolyLevel and replacing a crumbled section of concrete.
The homeowners were blown away by the knowledge and reputation of EFS and their Design Specialist.
In springtime, the EFS crew installed the PolyLevel and poured new concrete to repair a small section that had crumbled over the years prior.

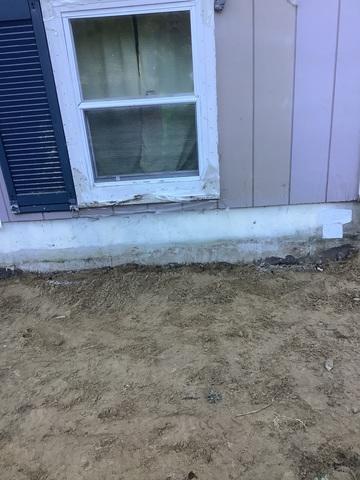
A funeral home in New London, New Hampshire, had the main water line break a few years ago. The water ended up undermining their foundation wall. The owner of the funeral home would like to have someone look at their stone foundation. Our design specialist examined the foundation wall and recommended installing a Masonry Wall in place of the undermined section of the foundation.
Our production team began by exposing the foundation wall. The team poured a new footing and began laying their leads. The team continued laying masonry blocks until they reached the joist from the main floor.
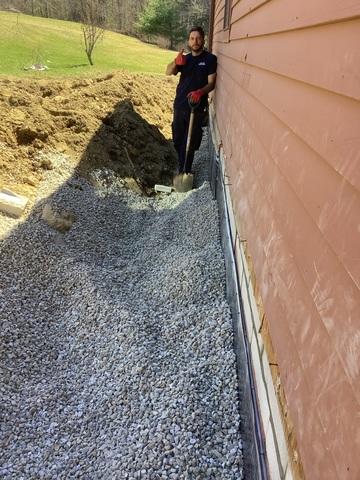
A homeowner in Concord, New Hampshire, was experiencing some settlement in their home. The back of their home had a significant slope. The residence had a wooden retaining wall that held dirt up for a walkway behind the home. Our design specialist Nate assessed the home inside in out. Nate found 2" of settlement toward the back of the home. In addition to the home settling, Nate worried about an elevated deck on the back of the home is in danger of settling as well. Nate recommended installing a bigger concrete retaining wall that will hold the soil better than the wooden one. Nate planned to add Helical anchors and EZ posts to help secure the supports of the deck.
Our production team led by Nick C. began the project by removing the old retaining wall and several feet of dirt so they could pour a footing for the new retaining wall. Once the dirt was removed, the team created a form to pour concrete into. The team poured the footing and let it cure. Following the footing being cured, the team set up additional forms to create the retaining wall. The team called in a concrete truck to fill the forms with concrete. The team had set up holes in the wall to allow for the helical anchors to attach to the EZ posts. After the retaining wall is cured, the team attached the Helical anchors to the EZ post.
The team was able to secure the home's foundation and prevent further settlement of the home and porch.

A homeowner in Contoocook, New Hampshire, had lived in their home for the past 10 years. They planned to remodel their garage but needed to make sure the slab can be fixed. The homeowners were told by other contractors that they would need to pour a brand new slab. The homeowners then reached out to EFS to see if we could find them a repair. Our design specialist Victor recommended installing PolyLevel and NexusPro to lift, level, and seal the slab in the garage.
Our production team first started by drilling port holes in a grid pattern into the slab. The port holes gave the team a space to inject PolyLevel under the concrete. The team injected the PolyLevel under the slab to precisely lift and level the concrete. After they lifted and leveled the slab the team then started sealing the cracks with NexusPro. They used a motorized caulking gun to squeeze NexusPro into all of the cracks. To make sure the cracks are sealed the team used a set of metal spoons to push the NexusPro deep into the cracks and to leave a smooth finish.
The homeowner was very happy with the results of the project. They can finally remodel their garage like they wanted to.

A homeowner in Epsom, New Hampshire, had purchased their home in 1973. When they first purchased the home they noticed a slight crack in the foundation. The homeowners didn't think anything of it until they noticed the wall periodically leaking onto the basement floor. They attempted to fix the issue by installing a drain to collect all of the water. The drain wasn't a permanent fix but it did help in the short term until they noticed the wall started to lean inward more every year. Our design specialist Tom recommended installing a solution to address both things. Tom first recommended installing Geolocks on the foundation wall to straighten it, the second was to install a perimeter drainage system and CleanSpace to the back wall to collect all of the water coming into the basement.
Our production team began the project by addressing the bowing foundation wall. The team started by digging a trench parallel to the bowing wall. The team used an excavator to dig a trench 10' away from the wall so we can use our Geolocks. After the trench was dug, the team drilled 8 small holes into the foundation walls. These small holes are so our Geolock rods can go through the wall, through the soil, and into the trench. The team then attached Geolock Plates against the foundation wall and the inner wall of the trench. After both ends were secured the team used a power drill to tighten the Geolocks to pull them together. The Geolocks will get tighter and begin to pull the wall until straight. After the team straightened the wall, the team moved on to installing the waterproofing system. The team first chipped out the concrete at the base of the wall. WaterGuard was installed in a trench at the base of the wall to collect any water that trickled down that wall. The WaterGuard led to a sump pump that was installed in the corner of the basement. After the UltraSump and WaterGuard were set up, the team then began installing the CleanSpace over the Geolocks and the rest of the wall. The team began by installing CleanSpace at the top of the wall. They sealed the top and started to move down the wall. To make sure the Geolocks could still be adjusted the team left part of the Geolock exposed. When the team was near the bottom of the wall they tied in the CleanSpace to the WaterGuard so any water coming down the wall would enter into the perimeter drainage system. After the CleanSpace and the perimeter drainage system were tied in together the team poured crushed stone and concrete over the WaterGuard and around the basin of the UltraSump. As the concrete was curing the team plumbed the UltraSump outside and connected an IceGuard to the exterior drainage line. The IceGuard will prevent the drainage line from freezing and causing a backup of water back into the basement.
The homeowner was very happy with the results of the project. They don't have to worry about their foundation wall bowing or water collecting in their basement anymore.

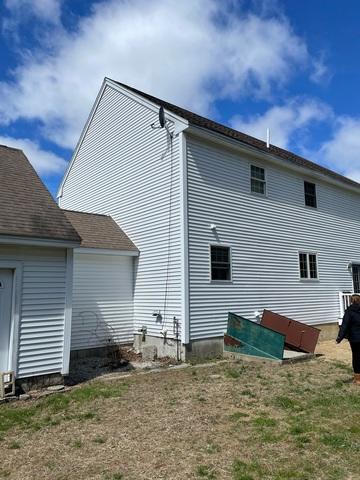
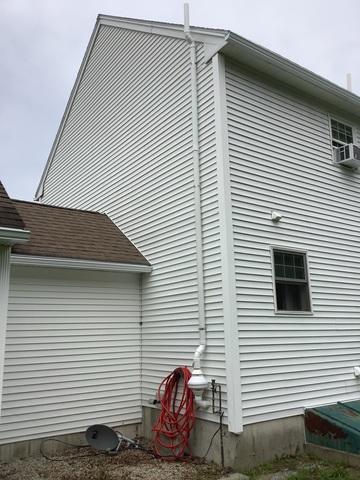
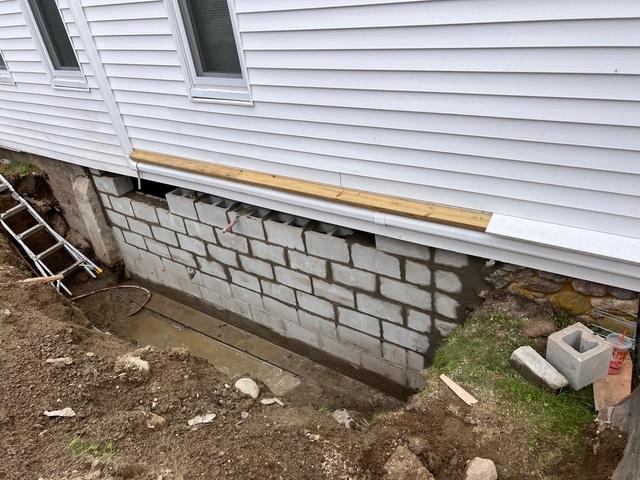
A homeowner in Chichester, New Hampshire, has lived in their home for the past 20 years. This year a tree fell on the corner of their home and caused damage to the roof and the foundation. The homeowner filed an insurance claim in which the insurance company told the homeowner to find a company to repair the home. They reached out to Erickson Foundation Solutions for a free inspection. Our Design Specialist Isaac inspected the home's foundation and found that the corner of the foundation was the only part affected by the tree falling on the house. Isaac recommended installing a block masonry wall and a new egress window to the cracked section of the foundation. Before installation could begin the homeowner was required to remove a section of the front porch to give us access to the foundation.
Our installation team began by exposing the foundation wall and began removing the damaged section of the wall. The team removed all the debris and began preparing to install the Masonry Block Wall. The team began laying the masonry blocks and built up the wall. At the top of the foundation, the team installed an egress window and installed some waterproofing on the outside foundation wall to protect the foundation wall.
The homeowners were very pleased with the results of the project.

A homeowner in Concord, New Hampshire, has lived in their over 100-year-old home for the last 40+ years. They don't know exactly when it started but a long time ago they noticed a sag on the main floor of the home. They finally decided they would like to have this corrected so they reached out to EFS for a free inspection of their home. Our Design Specialist Victor recommended installing 6 SmartJacks with a 28' Supplemental beam and a SaniDry into the basement to eliminate the sag in the floors and reduce the moisture in the basement.
Our installation team began by marking where to install each SmartJack in the basement. The team will install 3 SmartJacks and 14' of Supplemental beam to the section of the basement near the stairs into the basement, the other 3 SmartJacks and 14' of Supplemental beam will be installed on the side of the basement near the washer and dryer. After all the locations of the supports were marked, the team began chipping out concrete to install our big SmarkJack footings. Once the team installed all 6 footings they then started installing the supplemental beams and SmartJacks. To attach the supports and the beam the team propped up the beam using a series of ties to hold the beam up while they secured the SmartJacks to the beam with our U bracket. The team secured all the supports to the two beams and began to lift up the floor system using our adjustable bracket on the SmarkJacks. After the floor was lifted and leveled, the team then poured concrete over the footings of the SmartJacks. Lastly, the team installed a SaniDry in the basement to manage the humidity in the basement.
The homeowners were very pleased with the work done by EFS and the homeowners no longer have to deal with sagging floors on their main floors.

A homeowner in Bradford, New Hampshire, moved into their 1850s home 4 years ago. Since they moved in they have noticed cold drafts and mice coming from the crawlspace. The house is set on a fieldstone foundation and the homeowner thinks there is a hole in the crawlspace allowing the mice and cold air in. The homeowner decided to call EFS for a free inspection. Our Design Specialist Jason inspected the entire basement/ crawlspace and found some small gaps that were allowing mice and cold air into the crawlspace/home. Jason recommended installing PolyLevel Wall Restoration to the fieldstone and sealing up any cracks or holes that mice or cold air could travel through.
Our installation traveled into the crawlspace which only had 30-34 inches of clearance and sprayed PolyLevel Wall Restoration to the fieldstone foundation in the crawlspace. The PolyLevel Wall Restoration is a 2 part mixture that will rapidly expand when exposed to each other and air. The gaps were all sealed by the PolyLevel expanding into cracks and holes in the fieldstone foundation.
The homeowners immediately saw a difference inside their home. There were no cold drafts and the home has caught all of the mice in the basement and hasn't seen any more enter the home.

A homeowner in Warner, New Hampshire, built their home in the early 2000s. About 10 years ago they noticed a crack forming on the foundation wall in the basement. The crack was forming next to an electrical outlet and the homeowner was worried about water entering the basement and causing an electrical issue. The homeowners decided to call EFS for a free inspection and our Design Specialist Victor inspected the basement and recommended installing FlexiSpan over the crack on the wall. The FlexiSpan will allow water to travel down the crack but NOT enter the basement because of the membrane we install over the crack and the drain we install at the bottom of the wall.
Our installation team began by cleaning up the crack and chipping out a small section of concrete from the bottom of the wall. Then the team laid a membrane over the crack which will not allow water to penetrate into the basement. Once the membrane was set up the team secured it with caulking which will hold it in place. Next, the team installed a drain at the bottom of the wall to send the water below the home. After the drain was installed, the team then covered the drain with concrete.
The homeowner was pleased with the installation of the FlexiSpan and that it will protect the home from water entering the basement.

This homeowner in Concord, New Hampshire, has lived in their home for about 20 years. A couple of years into owning the home the homeowner started to notice some sagging of the floors around their home. The problem hasn't gotten worse in around 18 years but the homeowner would still like the problem looked at. They decided to call EFS for a free inspection and our Design Specialist Victor examined the floor system and recommended installing 3 SmartJacks with a 9' Supplemental beam to add support to the floor system.
Our installation team began by chipping out 3 footings for the SmartJacks. The team installed our big plates underneath the slab and then installed the rest of the SmartJacks and the supplemental beam against the floor system. The team used the adjustable top bracket of the SmartJacks to lift the floor system and level the floor as much as we could. After all the lifting was complete the team mixed up concrete and covered the SmartJack footings with concrete to lock them in place.
The homeowner was very happy with the results of the SmartJack installation in their basement.

This homeowner in Hooksett, NH was concerned with the condition of their front walkway which was comprised of concrete slabs. The concrete ran from the driveway, leading all the way up to the front porch of the home. Where the concrete met the porch, the slab had settled up to 2 inches, which had become a very dangerous trip hazard for the family. Temporarily, the homeowner had placed some unsightly blocks to help with this step, but they really wanted a permanent solution to have the concrete fixed.
Our team offered a free inspection, and specialist Jason Vachon proposed using PolyLevel to lift and stabilize the sunken concrete . He also recommended all the joints along the walkway get sealed with NexusPro, which would prevent water from flowing directly under the slabs and causing more damage.
The first step of the repairs involved lifting the concrete, especially where the walkway became a step for the front porch. Our installation specialists successfully lifted and stabilized this concrete, raised it 2 inches and created a safe step for the homeowners. Once injection of the polymer material was complete, the team installed NexusPro caulking to seal all the joints along the entire length of the walkway. This not only made the walkway more pleasing to the eye, but by sealing the joints would prevent too much water from flowing beneath the concrete, which would eventually lead to settlement and cracking.
Excellent transformation for this homeowner in Hooksett, and they were very pleased with the results.


A homeowner in Bow, New Hampshire, has a semi-finished basement that they would like to add a bedroom to. To make sure they stay in code compliance with the town, the homeowners would need to install a window into their basement that could be used in case of an emergency. The homeowner called EFS about the installation of a window in the basement and Rockwell so they could climb out of the basement if needed. Our Design Specialist Victor inspected the basement and found the best location to install the new basement window and Rockwell.
Our installation team began by exposing the foundation wall. Once exposed, the team cut out a section of the wall so they could install the new basement window. The team framed the window into the concrete and installed ample waterproofing to prevent water from seeping into the basement. After the window was installed the team then began to install the Rockwell against the foundation wall. The Rockwell was secured against the foundation wall and the team then installed crushed stone at the bottom of the Rockwell to help drain water. After, the team then began piloting holes into the foundation so we could secure the top of the RockWell door. The door will help to guide water and/or snow from collecting at the bottom of the Rockwell.
The homeowner was very pleased with the installation of the basement window and RockWell to make their basement code compliant with the town of Bow, NH. They were now able to add the bedroom to the basement.

The owners of this home in Concord, NH had lived there for about a year and knew there were some concerns they needed to address. At the back of the house on the exterior, there was a large concrete patio extending from the edge of the home's foundation all the way to the pool deck. The concern with this concrete slab was it sloped towards the home instead of being level, or sloping away from the home. This meant when it rained, all the run off drained towards the house, and ultimately was leading to the homeowners having a wet basement full of unwanted moisture. After addressing the moisture concern on the interior of their basement, they knew the situation on the outside of the home also needed to be fixed.
Our specialist, Victor Tapia, designed and proposed the ideal solution with our PolyLevel injection. Through slab jacking the sloping patio, the homeowners would not need to consider demolishing or removing any concrete, which would have been a noisy and messy process. Instead, the polymer foam injection process is quick, clean, and efficient.
Led by Nick Melo, our concrete repair specialists were able to complete the project in a single day, lifting and repairing the entire concrete slab to the desired height and slope. Ensuring the water run-off would now flow away from the home instead of towards it, the then sealed the perimeter of the concrete where it abutted the foundation, adding a further layer of protection.
The homeowners were pleased with the work and had incredible peace of mind that their basement was going to stay dry, and that their slab was in good condition.


A homeowner in Hooksett, New Hampshire, has lived in their home for the past 30 years. The homeowners have noticed a sag in the sunroom. In the last couple of years, they have become worried about the structural integrity of their second-level sunroom and porch. The homeowner decided to call EFS for a free inspection of the supports of their sunroom. Our Design Specialist Victor visited the home and inspected the structural integrity of the sunroom and recommended replacing the supports with a combination of Helical Piers and EZ Posts.
Our installation team began by setting up temporary supports around the existing supports. Once the temp posts were set up the team then removed the old supports and began setting up for installing the 4 Helical Piers under the main structure of the sunroom, then the remaining 4 will be EZ posts installed under the stairs and deck. Because of some tight access points, the team had to use our handheld drive head for the supports being installed under the stairs. For the remainder of the supports, we used our excavator with a similar drive head attached. The team drove each pier down into the ground until they reached their predetermined pressure, which was based on the weight of the structure. Once all the piers were driven into the ground, the team installed a porch bracket to each and then installed 6x6 Pressure Treated wood to the bracket and up to the bottom of the sunroom. Once all of the supports were secured, the team then removed all of the temporary supports.
The homeowner was very pleased with the results of the piers being installed under their sunroom.

A homeowner in Franklin, New Hampshire, had high levels of humidity in their basement. They had a dehumidifier in their basement but they were tired of lugging up the water up the stairs every couple of days. The homeowners decided to call EFS for an inspection. Our Design Specialist Jason found that the relative humidity of the basement was 52.8% so he recommended installing our SaniDry Sedona Dehumidifier with a discharge line that will feed into a pump that will expell the condensed humidity outside the home.
Our installation team came to the home and installed the SaniDry Sedona in the basement and made sure it was level and the discharge line was inserted into the pump. With the dehumidifier installed the homeowner can set the humidity to whatever is comfortable for them.
Now the homeowner doesn't have to lug water buckets up the stairs and the humidity in their basement is at a comfortable level.

A homeowner in Concord, New Hampshire, purchased their home in 2016 and has been upgrading and repairing items around the home. The home was built in the early 1900s and the homeowners wanted to make sure the supports in the basement were strong enough to support the modern-day appliances. The homeowners called EFS for a free inspection of their basement by our Design Specialist. Our specialist Jason Vachon met with the homeowner and talked to them about their concerns. After their talk, Jason went into the basement and inspected the floor system. After his inspection, he recommended installing 3 SmartJacks and a 16-foot supplemental beam to add support to the floor system.
Our installation team led by Eric Witham began by chipping out small sections of concrete so we could install our big plate footings. After the concrete was chipped and the debris was removed we then poured crushed stone into the hole where the footings will be installed. Next, we installed the big plates and then measured and cut each SmartJack to the correct size. We then installed each SmartJack and the supplemental beam beneath the floor system. After the system was installed and everything was leveled we then mixed up concrete and poured it over SmartJacks footings to lock them into place.
The homeowner was very pleased to cross another item off their list. They can already feel the difference in the floors.

Jim M. of Hooksett, New Hampshire never had basement issues until about two weeks ago. In that time, their basement had flooded twice. This was a big concern for Jim's family, especially since they use the basement for storage space. Looking for a way to permanently keep the basement dry, this family reached out to Erickson Foundation Soulutions.
After contacting out Customer Care team, we scheduled Jim a free inspection with our Design Specialist, Victor Tapia. Victor identified the issues that led to the basement flooding, and offered solutions based on what was right for Jim's family. He ultimately suggested installing WaterGuard perimeter drainage and our TripleSafe sump pump system. The perimeter drainage goes along the footing of the foundation and collects water before entering the basement. It then delivers the water to the sump pump system, which expels water out of the home through an exterior discharge line. IceGuard was added to the exterior discharge line to prevent it from freezing and causing water to get backed up.
With this system in place, Jim's family no longer needs to fear water entering the basement. They now have a safe and dry storage space permanently!